How to generate a thumbnail
Generating a thumbnail using this plugin is very easy. In blueprint, you can use the Generate Thumbnail node. The function can also be used from C++ by calling UThumbnailGenerator::Get()->GenerateActorThumbnail(…)
Setting up the project
First of all, let’s go over how to install this plugin into any project.
With pre-build binaries (From marketplace):
- Create an empty “Blueprint only” project using the epic games launcher, or use any other Blueprint project.
- Copy the entire ThumbnailGenerator folder into “YourProjectDir/Plugins/“, or install the plugin into your engine using the Epic Games Launcher.
- Launch your project and make sure the plugin is enabled in Edit > Plugins > Project > Thumbnail Generator
Building the plugin yourself (Required for other platforms than windows):
- Create an empty C++ project using the epic games launcher, or use any C++ capable project.
- Copy the ThumbnailGenerator folder into “YourProjectDir/Plugins/” (Only subdirectories Content, Source, and ThumbnailGenerator.uplugin are required).
- Regenerate your project files and recompile the project.
- Launch your project and make sure the plugin is enabled in Edit > Plugins > Project > Thumbnail Generator.
Setting up a test environment
Let’s quickly go over how to add some simple UI where we are able to test the capabilities of this plugin.
1. Create a UserWidget UMG_ThumbnailUI.
2. Open this UserWidget and a Canvas and an Image in the following hierarchy.

3. Enable Size To Content on the image, and move on to the Event Graph.
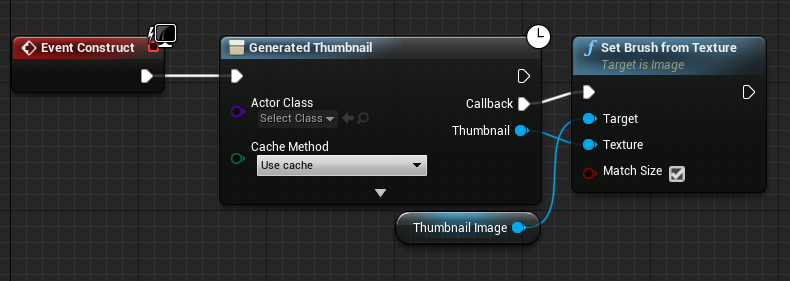
4. In Construct, add the following nodes:
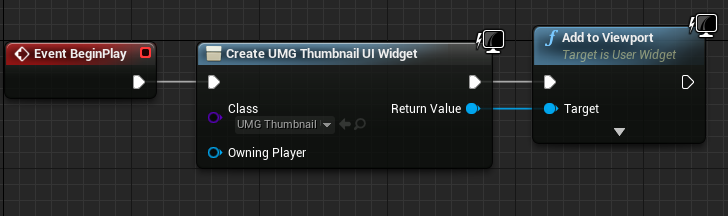
5. And finally, in our level blueprint, add the UI to the viewport like this:
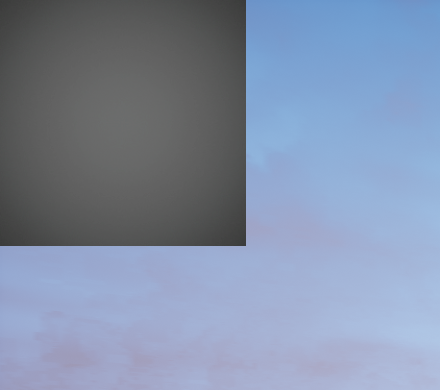
6. We should now be able to select any actor class in our UMG_ThumbnailUI and see a thumbnail of that actor in the top-left corner when we press Play/Simulate. If we for example select the empty Actor class we will see this:
This setup will be used in the following examples, but any setup where you are able to call Generate Thumbnail should suffice.
Thumbnail Settings
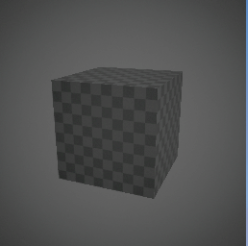
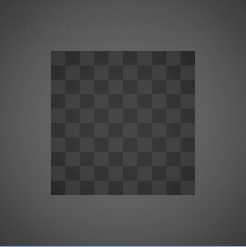
How the thumbnail is captured can be controlled through the Thumbnail Settings struct. You can set the default values of this struct in Project Settings > Plugins > Thumbnail Generator. So, let’s try this out. I will create a simple StaticMeshActor using the default editor cube. Capturing this actor yields the following result:
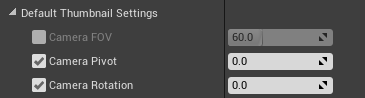
Maybe you don’t want a top-down perspective in your thumbnails and would prefer one from the front. Well this can easily be changed by modifying the following properties in Project Settings > Plugins > Thumbnail Generator.
Our thumbnail would now look like this:
Nifty eh? However, we might want the same camera perspective for all actors, but not the same background color. For that we would need to be able to override specific settings per-thumbnail. This is possible with the Thumbnail Settings struct passed into the Generate Thumbnail node.
So, let’s try and change the background color in our thumbnail, without affecting our new camera settings. In UMG_ThumbnailUI, pull out from Thumbnail Settings and select Make ThumbnailSettigns.
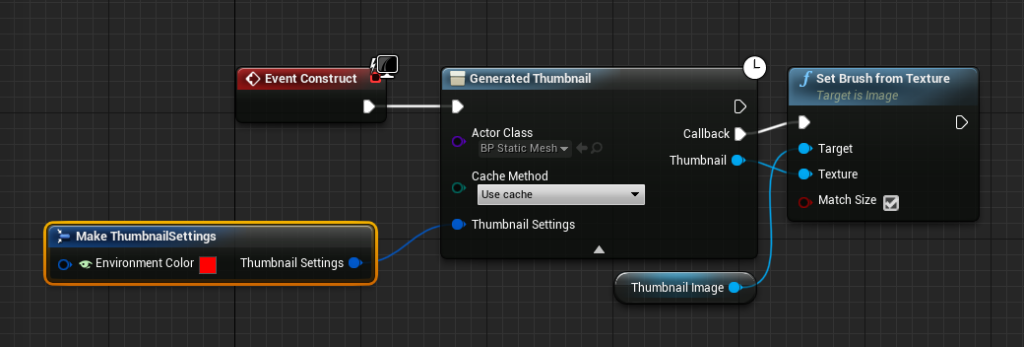
With the Make ThumbnailSettings node selected; enable the properties you wish to override for this capture in the details panel. In this example we have selected the Environment Color and have changed it to red.
With our custom thumbnail settings, lets press play again and take a look at the results.
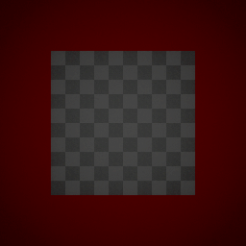
Look at that! Our camera settings have been preserved, but our background has changed.
Using settings to capture a Particle effect
As you’ve probably noticed, there are quite a few more settings than just background color. One of those are Simulate Scene Time. This setting is useful when capturing actors which requires a specified amount of time to elapse before the thumbnail is captured. One such actor would be a particle emitter.
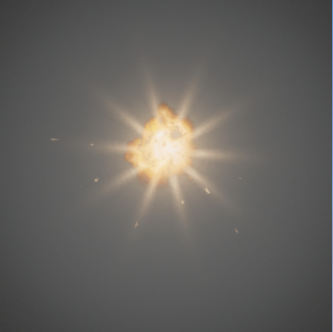
I will use an explosion particle from Epics Infinity Blade project, but any emitter should do for this example.
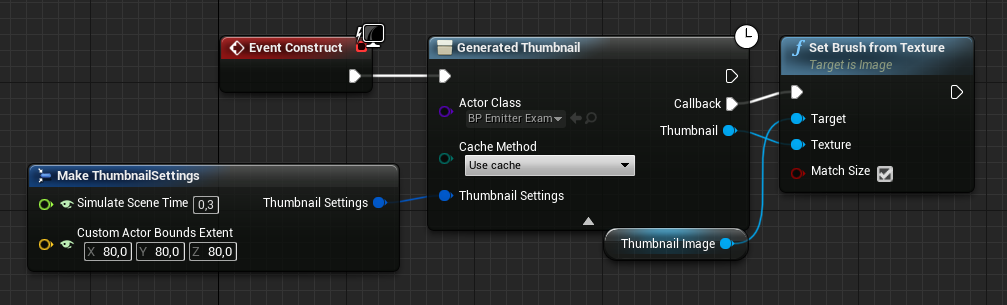
First, we need an actor to hold our particle emitter, so I create an empty actor with a Particle System Component as root. And set the Particle template to the particle effect we wish to capture.
With this actor selected in our Generate Thumbnail node, we can set the Simulate Scene Time to 0.3 and also set a Custom Actor Bounds Extend since the effect is missing proper bounds of its own. These values will need to be tweaked for each particle emitter you wish to capture.
The result of this setup looks a follow:
There are many more settings you can play around with. I would recommend that you experiment a bit with these values, but for now let’s move on to the next feature of this plugin.
Pre-Capture Thumbnail Scripts
Now that you’re an expert at the Thumbnail Settings, we should move on to the next cool thing, Pre-Capture Thumnail scripts!
Since there are many occasions where you might want to change some details of your actor before capturing a thumbnail, this plugin includes two ways of executing code on the actor in the thumbnail scene before the capture occurs.
Thumbnail Actor Interface
One of those is the ThumbnailActorInterface. Any actor which implements this interface will be able to override the event Pre Capture Actor Thumbnail.
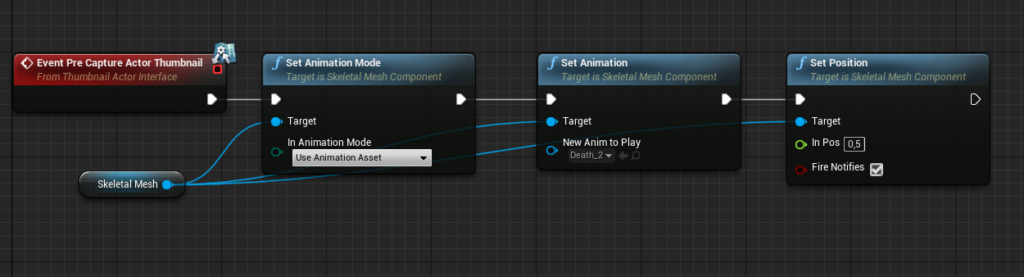
This is particularly useful when capturing skeletal meshes. Often you wouldn’t want to capture a character in T-pose, and the Pre Capture Actor Thumbnail event is the perfect place to pose your character before the thumbnail is captured.
Using the Animation Starter Pack from the Epic Games Store I have set up a simple actor with a skeletal mesh, set to the default Mannequin. This actor implements our ThumbnailActorInterface and has overridden the Pre Capture Actor Thumbnail event in the following manor:
Quickly generating our new thumbnail, we can see the result:
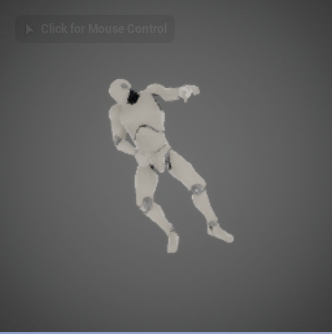
With this simple code we are able to pose our mesh in any way we want. In this example we use an animation to achieve this, but any method of posing the mesh would suffice. This is also a great place to perform other modifications, such as setting material parameters, och changing meshes all together.
Thumbnail Generator Script
Sometimes you don’t want to tun a piece of code on just one actor, but on all of them before their thumbnail is captured. Is this case a ThumbnailGeneratorScript is what you would want to use.
You can create a ThumbnailGeneratorScript by creating a child of the UThumbnailGeneratorScript and implement its PreCaptureActorThumbnail event, then add it to Project Settings > Plugins > Thumbnail Generator > ThumbnailGeneratorScripts. This script will now always get run before the capture of any actor.
Getting the example project
You can download an example project with all the examples as explained above here. You will need to install the ThumbnailGenerator plugin for the example project to work.