Unreal Engine Water integration
Not what you’re looking for? You can find the documentation here.
Don’t like the written tutorial format? There’s now an improved video version which you can find here!
This plugin comes shipped with a module which allows you to quickly set up water physics simulations for your Unreal Engine Water bodies. This module will automatically get loaded if the Water plugin is enabled for your project.
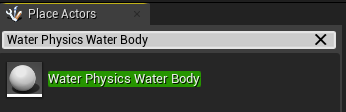
You can check whether the module has been loaded by searching for the “Water Physics Water Body” actor in the placement menu. If you are unable to find this actor here, try enabling the Water plugin for your project and restart the editor.
Once you are able to find the “Water Physics Water Body” actor in the placement menu, simply drag the actor out into the world where you have your Unreal Engine water bodies.
With your “Water Physics Water Body” actor selected, go to the details panel and add a new element to the “Water Bodies” array. Expand this element and select which water body you wish to add water physics to with the “Water Body” property. You can also specify here whether you want the water physics simulation to ask Unreal for the wave and/or the velocity information from your water body. If you are not using these features it is advised that you disable them as they can come at a certain performance penalty.
We can now make just about anything float on our water by simply enabling physics and overlap events!
The physics needs to be enabled as this plugin uses physics forces to realistically simulate all forces involved in water physics simulation. The overlap event needs to be enabled such that we can detect when our physics body collides with the water surface. Enabling overlaps has the negative consequence of making it a bit more expensive to move objects around, however due to limitations with how Unreal implements its collision with the water surfaces, this is the only realistic way of adding this type of functionality.
If enabling overlaps on all your physics bodies is not acceptable for your project you could read the chapter about setting up your very own water body physics setup where you have greater control over how physics bodies get added to the water physics simulation.
Creating a boat: Boat Mesh (Optional)
The main strength of this plugin is its ability allow you to easily create very realistic boat physics. Let’s go through the setup of a basic boat which can be fully controlled by the player. First thing we need is a mesh to represent our boat, I’m just going to create a simple mesh right inside of unreal, however you can use any mesh you’d like as long as you have a suitable collider for physics simulation attached to this mesh.
Creating the Mesh
First thing first, we need a mesh to represent our boat. To do this I will simply use Unreal’s built in mesh editor to create a rudimentary boat mesh.

We start with a cube by going to the Geometry section in the Place Actor panel, we then drag the cube out into my level. Begin by setting the size to something roughly representing the shape of our boat, in this case let’s set it to X: 400, Y: 200, Z: 100 (4x2x1 m).
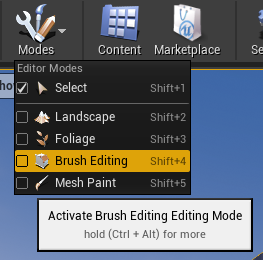
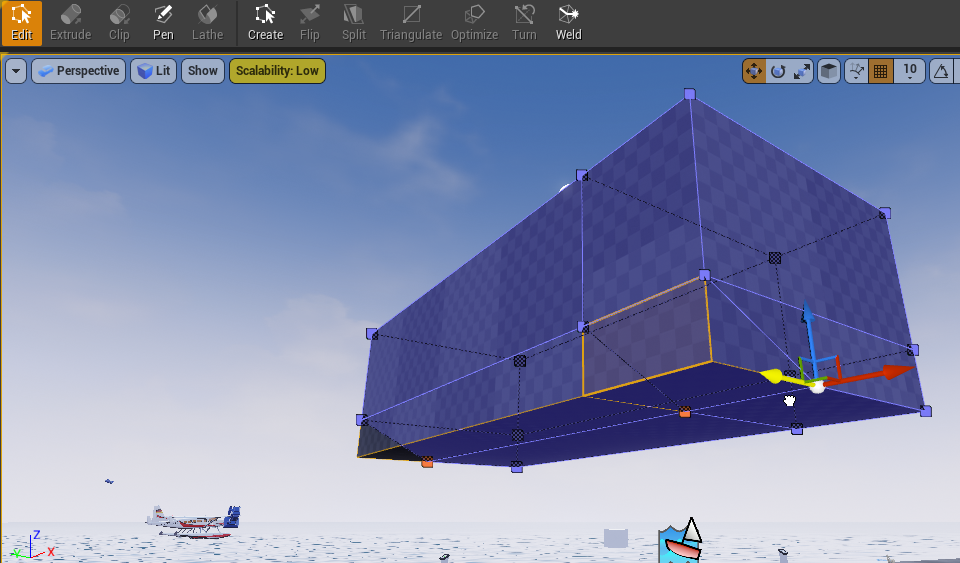
We then enter Brush Edit mode and position ourselves under our cube such that we can edit bottom and the front.
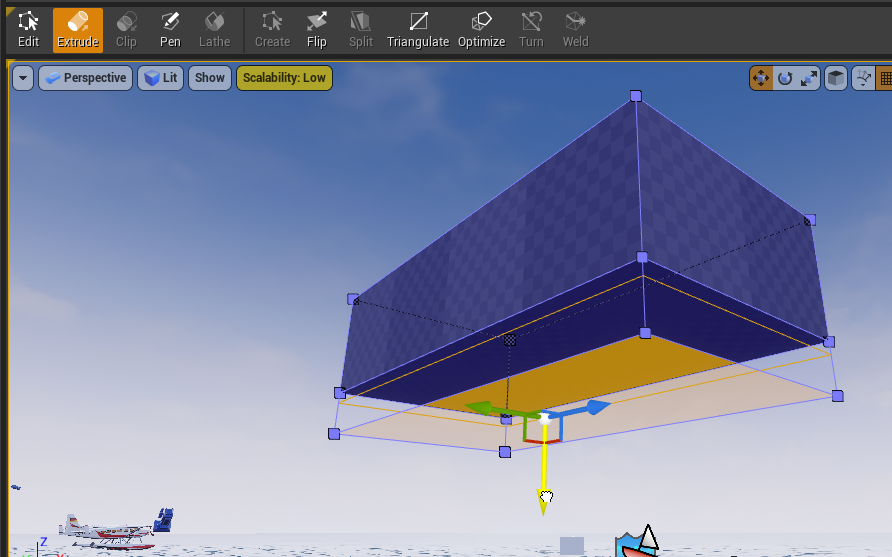
In extrude mode, select the bottom and pull it down roughly 40-50cm, In my case I just kind of eyeball it. NOTE: Enabling snapping with 10cm intervals makes the rest of this editing a lot easier.
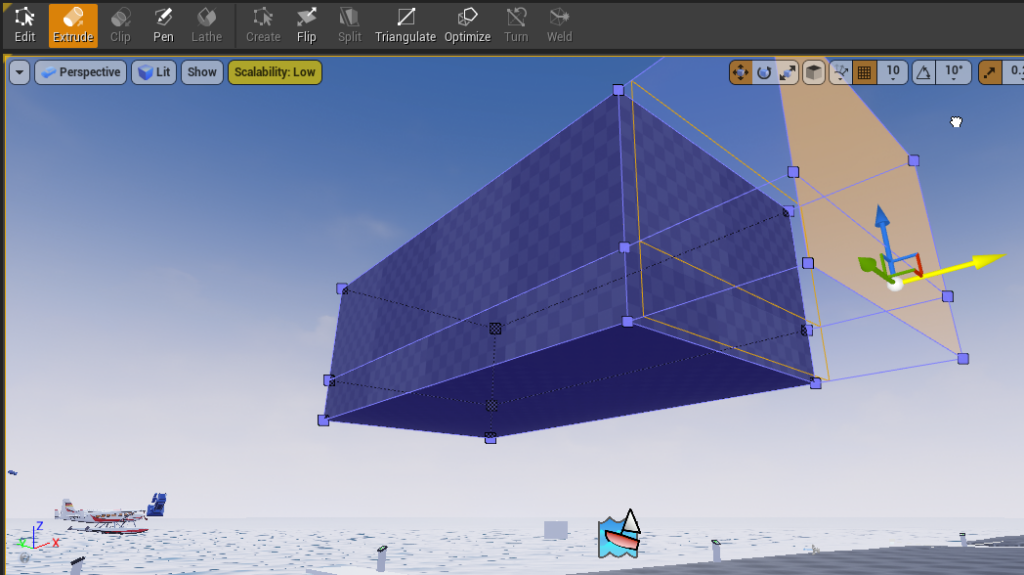
We now select the two front faces (holding left ctrl and while selecting the faces using left mouse button) and extrude them roughly a meter (again, enabling snapping makes this a lot easier).
We can now go back into edit mode and start moving the edges into a boat-shape.
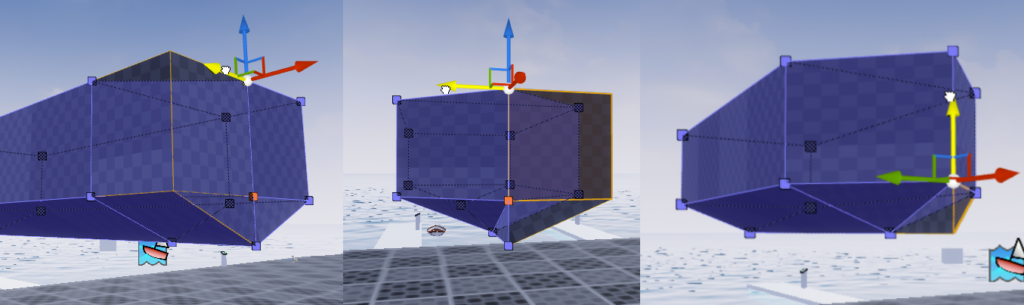
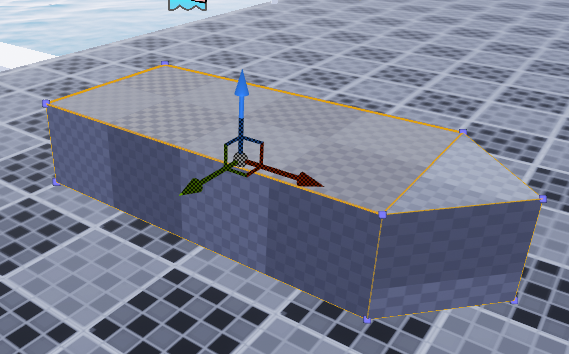
After moving all the edges into place, we now have something roughly resembling a boat. We can now leave brush edit mode and go into the details panel to convert our brush into a usable StaticMesh asset.
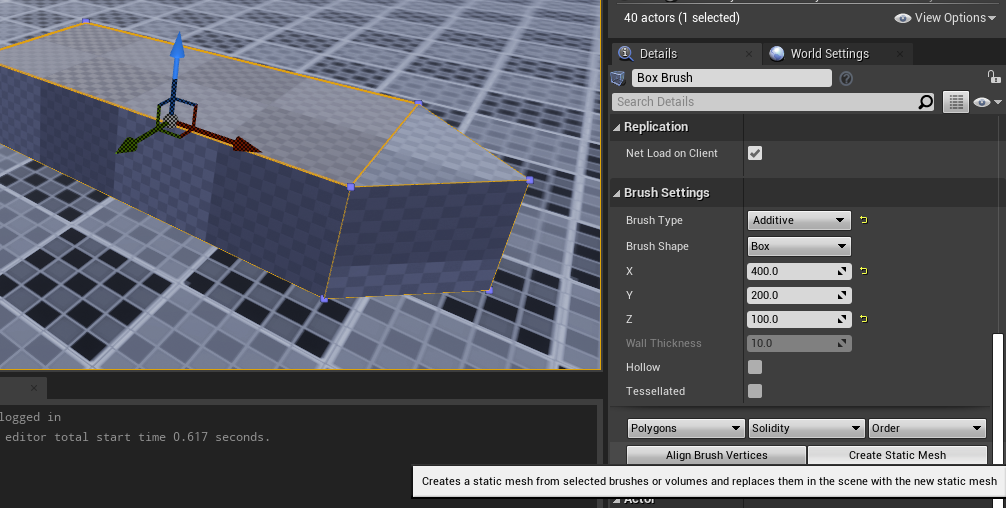
With our boat selected, under the advanced tab in the Brush Settings category, press the “Create Static Mesh” button. Save the mesh at the your desired location with the name of your choice, I’m just going to put it in “Content/Tutorial/Boat_Mesh”.
Boat Mesh Collision
Now we have a mesh that kind of looks like a boat! However it’s not exactly usable for our purpose without proper collision, so let’s set that up.
Open your generated mesh asset in unreal and navigate to the Convex Decomposition window (If you’re unable to find it, it should appear if you navigate to Collision -> Auto Convex Collsion). This part is a bit tricky, you will probably have to tweak the values here a fair bit to get a collider that you’re happy with. Some settings which worked well for me was to max out Hull Precision, and set Max Hull Verts to 12-13.
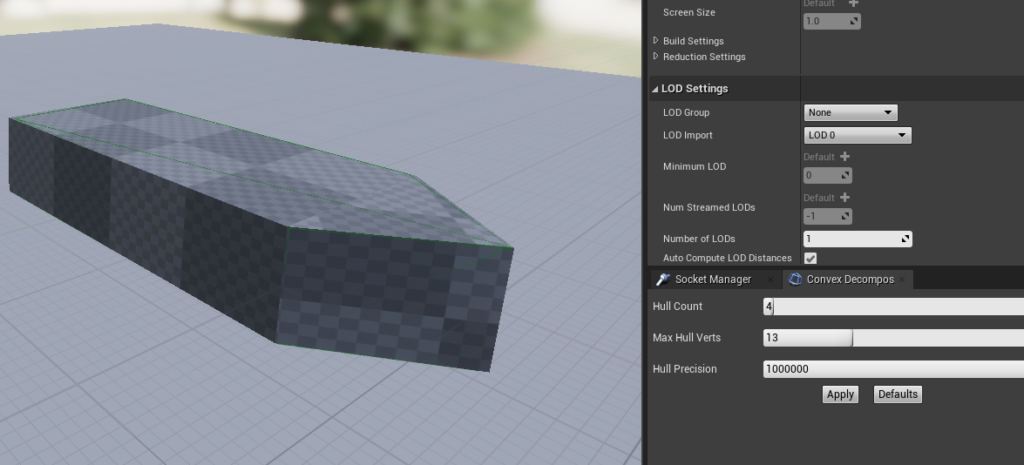
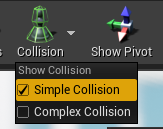
Just press apply and inspect your collision by enabling Show Collision under the Collision section in the toolbar. If you are happy with the collision, then you are done! You now have a boat mesh that is ready for some water physics simulation!
Creating a boat: The Blueprint
With a boat mesh, with a suitable collider for physics simulation, we are now ready to create a drivable boat on our water surface. For this example I will be using Blueprint, but the same principles apply if you were to use C++.
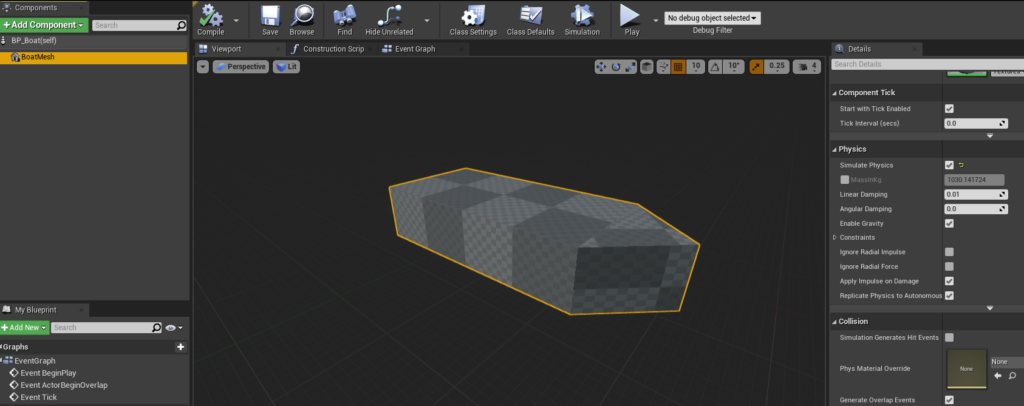
We begin by creating a new pawn, I will place mine in “Content/Tutorial/BP_Boat”.

We then set our boat mesh as the root component and enable SimulatePhysics on the StaticMeshComponent. Also ensure “Generate Overlap Events” is enabled on our StaticMesh component.
There we go, we have a boat that should in theory be able to float! But before we go and test it out, let’s quickly add simple camera controls to our pawn. We begin by adding a SpringArm component, then adding a Camera to this component.
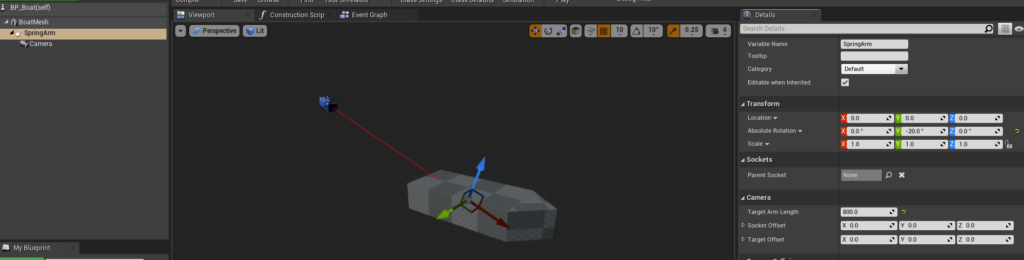
I will set the length of the spring arm to around 800cm, however this length might vary depending on the size of your boat. I will also set the rotation to be Absolute, with an initial rotation of -20 Yaw to make the camera experience just a bit smoother.
We then add the following script to allow camera movement with the mouse:
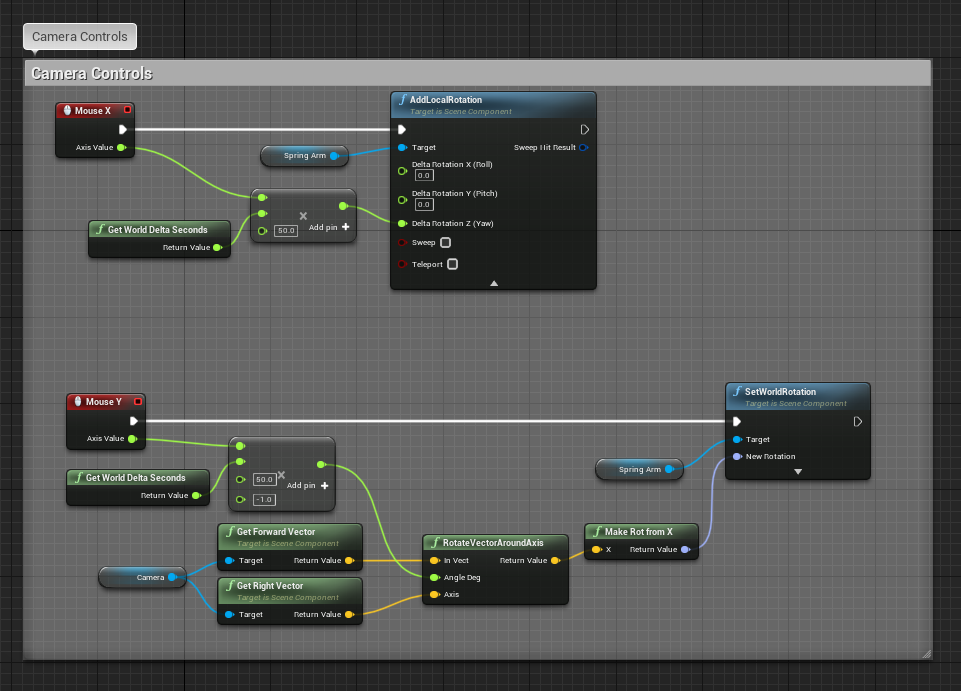
We can now place our boat pawn in the world. I will enable Auto Possess Player on Player 0 to allow me to control the boat pawn, however any method of possessing the boat pawn should suffice.
We now have a boat which can float! That’s pretty cool considering how little code we’ve added so far. But a boat that just floats is not much of a boat, so let’s start looking at propulsion.
I will begin by adding a scene component which will represent our engine. This is mostly to make the placement of the engine easier, however you could just as easily represent this location with a variable in your code.
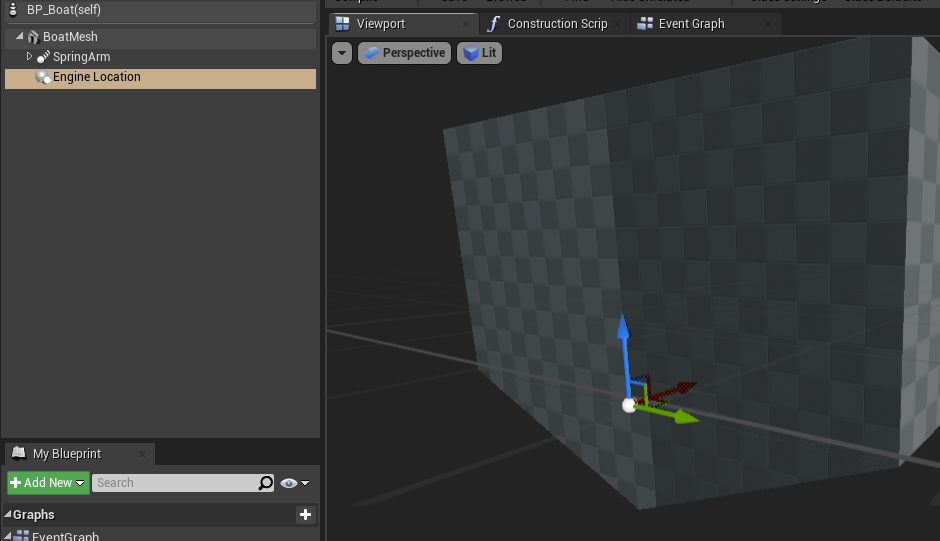
I will place the engine at the back of the boat, roughly where I would expect to see an engine on a real boat.
We can then simulate the behaviour of a boat engine by adding a force at the direction, and location of the engine component like this:
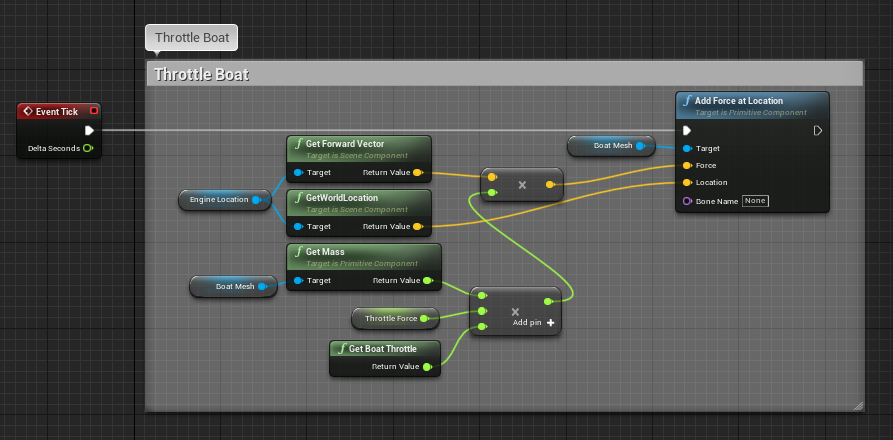
The “Throttle Force” variable is just a member property which I’ve made instance editable, with the default value set to 300. You can adjust this as you like to change the strength of your engine.
The “Get Boat Throttle” force function simply reads the state of the W/S keys from the player controller and produces a throttle in the range of [-1, 1]. It is implemented as follows:
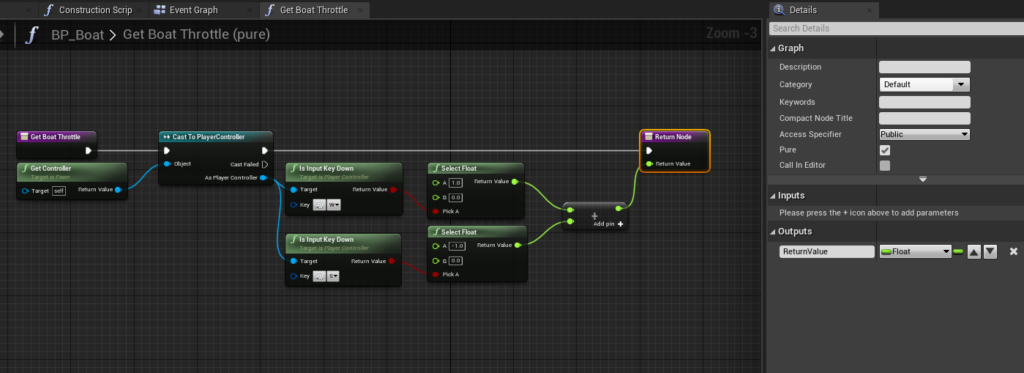
With our throttle logic in place, we are ready to give it a test!
Look at it go! We can play around with the throttle values at this point, and perhaps adjust the mass of our boat to make it behave more to our liking when racing through the water. I will tweak the mass to make the boat sink in a bit more. If you do not wish to adjust the mass of your boat, you could instead tweak this behaviour using a WaterPhysicsSettingsComponent.
So, we now have a boat which can race through water, but no way of steering it, we should probably address that. The simplest way of adding steering is to just change the direction of force applied by our engine. So right before we add our engine code, let’s add another block which controls the engine rotation as such:

This code is rather simple, it will take the EngineLocation component and turn in in the range of [-20, 20] degrees depending on the input from the “Get Boat Steering” function. This function is a copy of the “Get Boat Throttle” function we created earlier, however it listens to the A/D keys instead of W/S.
With this new steering logic added, lets take our boat for a spin!
Wow, it almost feels like a real boat! At this point there are a few more things we could do, like adding a rudder or tweaking the parameters of the water physics however that is better suited for a different kind of tutorial. If you want more complex examples with more details I would advice you to take a look at the Example Project for this plugin which has a much wider set of different boats and vehicles that you can take inspiration from.